Key Takeaways
1. Preparation is Crucial
Properly preparing your nails by removing old polish, shaping, and cleaning them ensures better adhesion and longer-lasting results. Don’t skip this essential step!
2. Easy Application and Removal
Nail strips are incredibly user-friendly, making them a convenient option for achieving salon-quality nails at home. Follow our step-by-step guides for seamless application and safe removal.
3. Endless Creative Possibilities
With a wide variety of colors, patterns, and styles available, nail strips offer endless opportunities for creativity. Mix and match designs, experiment with seasonal themes, and accessorize to make your nails uniquely yours.
Welcome to Your Beauty Marks, where we believe that beauty should be accessible, sustainable, and affordable. In today’s post, we’re diving into the world of DIY manicures and exploring the magic of nail strips. If you’re tired of spending a fortune at the salon or simply looking for a convenient way to keep your nails looking fabulous, nail strips are your new best friend. Stick around as we reveal tips and tricks for achieving salon-quality nails right in the comfort of your home.
What Are Nail Strips?
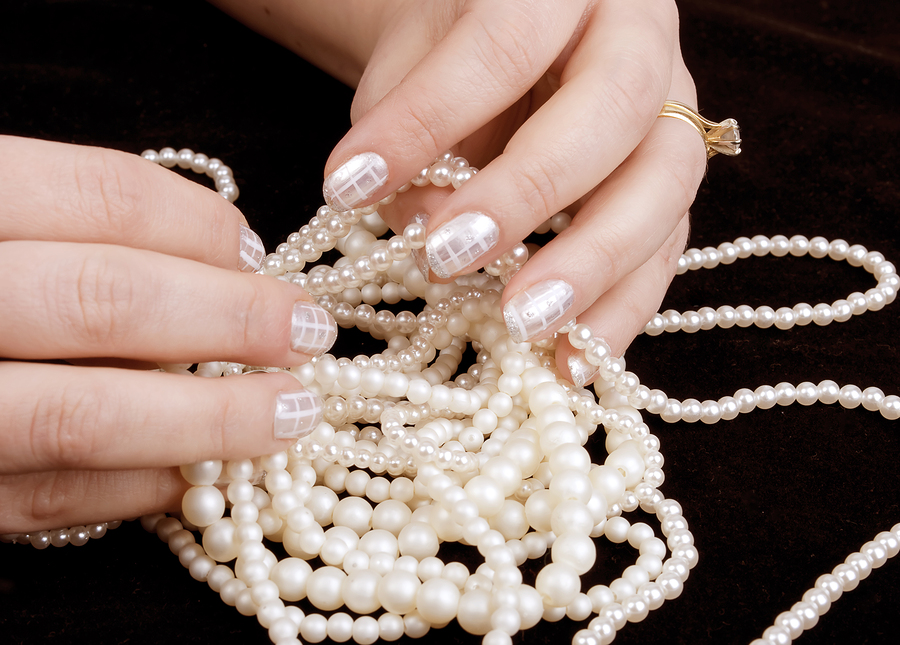
Nail strips are a game-changer in the world of DIY manicures. Essentially, they are adhesive designs that you can apply directly to your nails. These strips come in a variety of colors, patterns, and styles, making it easy to find something that suits your personal taste or the occasion.
Here are some key components of nail strips:
- Adhesive Base: The sticky part that adheres to your nail.
- Design Layer: The visible, decorative part that showcases the color or pattern.
- Protective Top Layer: Often a clear layer that adds durability and shine.
Whether you’re going for a classic French manicure, a bold geometric design, or something seasonal like holiday-themed patterns, nail strips offer endless possibilities. They are perfect for anyone looking to add a touch of flair to their nails without the hassle of traditional polish.
Why Choose Nail Strips?
When it comes to manicures, nail strips offer several advantages over traditional methods. Let’s break down why they might be the perfect choice for you:
Cost-Effective
Salon visits can be expensive, especially if you like to change your nail design frequently. Nail strips, on the other hand, are a budget-friendly alternative. You can achieve a professional look without breaking the bank.
Time-Saving
Applying nail strips is a quick and straightforward process. Unlike traditional manicures that require drying time, nail strips are ready to go as soon as you apply them. This makes them ideal for busy individuals who still want to maintain stylish nails.
Convenience
Nail strips are incredibly easy to apply and remove, making them a convenient option for everyone, from beginners to nail art enthusiasts. There’s no need for messy polish or complicated tools.
Flexibility
One of the best things about nail strips is the ability to change designs without commitment. If you get bored of a particular look, you can easily switch it up without damaging your nails. This flexibility allows you to experiment with different styles and trends.
Preparation is Key: How to Prep Your Nails
Before diving into the application process, it’s crucial to prepare your nails properly. A well-prepped nail surface ensures better adhesion and longer-lasting results. Follow these detailed steps to get your nails ready:
1. Remove Old Polish
Start by removing any existing nail polish using a gentle, acetone-free nail polish remover. This will give you a clean slate to work with.
2. Shape and File
Next, shape your nails to your desired look using a nail file. Whether you prefer a square, round, or almond shape, make sure all your nails are uniform for a polished appearance.
3. Care for Cuticles
Gently push back your cuticles using a cuticle pusher. You can also massage a bit of cuticle oil to soften them, but make sure to wipe off any excess oil before proceeding. This step ensures that the nail strips adhere properly and don’t lift at the edges.
4. Clean and Dry
It’s essential to avoid lotions and oils before applying nail strips. Clean your nails with a bit of rubbing alcohol to remove any residual oils and ensure they are completely dry.
5. Create the Perfect Surface
For the best adhesion, lightly buff the surface of your nails. This helps the nail strips stick better and last longer. Be gentle to avoid damaging your nails.
By following these preparation steps, you’ll create the perfect canvas for your nail strips, ensuring a flawless and lasting application.
Step-by-Step Application Guide
Now that your nails are prepped and ready, it’s time to apply the nail strips. Follow these step-by-step instructions for a flawless finish:
Materials Needed
- Nail strips of your choice
- Scissors
- Nail file
- Cuticle pusher (optional)
1. Choose the Right Size Strip
Start by selecting the nail strip that best fits each of your nails. Most nail strip kits come with multiple sizes, so take your time to find the perfect match. If needed, you can trim the strips with scissors for a custom fit.
2. Align and Press Down
Peel the nail strip from its backing and carefully align it with your nail’s base. Press down firmly in the center and then smooth outwards towards the edges to ensure there are no air bubbles. Use a cuticle pusher to press the strip into the corners for a snug fit.
3. Trim and File
Once the strip is securely in place, use scissors to trim any excess. Then, use a nail file to gently file off the remaining strip, filing in a downward motion to avoid lifting the edges. This will give you a clean, professional finish.
4. Repeat for Each Nail
Repeat the process for each nail, taking your time to ensure each strip is applied smoothly and securely. Patience is key to achieving a salon-quality look.
And there you have it! With these simple steps, you can achieve a stunning manicure without ever stepping foot in a salon.
Maintenance and Longevity Tips
To keep your nail strips looking fresh and fabulous for as long as possible, follow these maintenance and longevity tips:
Protective Measures
While nail strips are durable, it’s essential to take some protective measures during daily activities:
- Wear Gloves: When doing household chores like washing dishes or cleaning, wear gloves to protect your nails from water and harsh chemicals.
- Avoid Excessive Water Exposure: Try to limit prolonged exposure to water, as it can weaken the adhesive over time.
- Be Gentle: Avoid using your nails as tools to open cans or scrape surfaces. This can cause the edges to lift or chip.
Handling Minor Lifting
If you notice any minor lifting at the edges, don’t panic. You can easily fix it:
- Press Down: Gently press down on the lifted area to re-adhere it to your nail.
- Use a Top Coat: Apply a clear top coat over the nail strip to seal the edges and add extra protection.
Common Pitfalls to Avoid
To ensure your nail strips last as long as possible, avoid these common pitfalls:
- Skipping Nail Prep: Proper nail preparation is crucial for adhesion. Don’t skip this step!
- Using Lotions or Oils: Avoid applying lotions or oils before and immediately after applying the nail strips, as they can interfere with the adhesive.
- Rough Handling: Be mindful of how you use your hands to prevent unnecessary wear and tear on your nail strips.
By following these tips, you can enjoy your beautiful nail strips for up to two weeks or more, depending on your daily activities and care routine.
Creative Design Ideas
One of the most exciting aspects of using nail strips is the endless creative possibilities. Here are some fun and stylish ideas to inspire your next manicure:
Mix and Match
Don’t be afraid to mix and match different nail strip designs. Combine solid colors with patterns, or mix various patterns for a unique and eye-catching look. For example:
- Accent Nails: Use a bold pattern on one or two accent nails while keeping the rest a solid color.
- Alternating Designs: Alternate between two different designs on each nail for a playful and dynamic effect.
Seasonal and Themed Designs
Nail strips are perfect for celebrating holidays and special occasions. Here are some seasonal ideas:
- Spring: Floral patterns and pastel colors.
- Summer: Bright, tropical designs like palm leaves and flamingos.
- Fall: Warm, earthy tones and autumn leaves.
- Winter: Festive patterns like snowflakes and holiday-themed designs.
Accessorizing Your Nails
Take your nail art to the next level by accessorizing with jewelry or additional nail art elements:
- Nail Charms: Add small nail charms or decals for extra flair.
- Rhinestones: Apply rhinestones to create a sparkling, glamorous look.
- Nail Art Pens: Use nail art pens to draw intricate designs or add details to your nail strips.
Get creative and have fun experimenting with different designs and accessories. The possibilities are endless, and your nails will always be a reflection of your unique style.
Removing Nail Strips: The Easy Way
When it’s time to change your nail design or give your nails a break, removing nail strips is a breeze. Follow these simple steps for safe and easy removal:
Step-by-Step Removal Guide
Here’s how to remove your nail strips without damaging your nails:
- Soak in Warm Water: Start by soaking your nails in warm, soapy water for about 5-10 minutes. This helps to loosen the adhesive.
- Gently Peel Off: Once the adhesive has softened, gently peel the nail strip off from one corner. If you encounter resistance, soak your nails a bit longer.
- Use Nail Polish Remover: For any remaining adhesive residue, use a cotton pad soaked in nail polish remover to clean your nails thoroughly.
Recommended Nail Polish Removers
For the best results, use a gentle, acetone-free nail polish remover. Here are some recommendations:
- Non-Acetone Remover: Gentle on nails and effective at removing adhesive residue.
- Moisturizing Remover: Contains added moisturizers to keep your nails hydrated and healthy.
Post-Removal Nail Care
After removing your nail strips, it’s essential to care for your nails to keep them healthy and strong:
- Hydrate: Apply a nourishing cuticle oil or moisturizer to keep your nails and cuticles hydrated.
- Strengthen: Use a nail strengthener or hardener to reinforce your nails and prevent breakage.
- Rest: Give your nails a break from nail strips or polish for a few days to allow them to breathe and recover.
By following these steps, you can safely and easily remove your nail strips while maintaining the health and beauty of your natural nails.
Conclusion
In conclusion, nail strips are a fantastic option for anyone looking to achieve a salon-quality manicure at home. They offer numerous benefits, including cost-effectiveness, time-saving convenience, and the flexibility to change designs without commitment. By following our detailed preparation and application steps, you can ensure a flawless and long-lasting finish.
Don’t forget to explore creative design ideas to keep your nails looking fresh and stylish for any occasion. And when it’s time to remove your nail strips, our easy removal guide will help you do so safely while maintaining the health of your natural nails.
We hope this guide has inspired you to give DIY nail strips a try. At Your Beauty Marks, we’re committed to making beauty accessible, sustainable, and affordable. So go ahead, experiment with different designs, and enjoy the process of creating beautiful nails right at home.
Frequently Asked Questions
How long do nail strips typically last?
Nail strips can last anywhere from 7 to 14 days, depending on how well you prepare your nails and how you care for them. Following our maintenance tips can help extend their longevity.
Can I use a top coat over nail strips?
Yes, applying a clear top coat over your nail strips can add extra protection and shine. It can also help seal the edges and prevent lifting.
Are nail strips safe for my natural nails?
When applied and removed correctly, nail strips are generally safe for your natural nails. Be sure to follow our removal guide to avoid any damage.
Can I trim nail strips to fit my nails?
Absolutely! You can use scissors to trim the nail strips for a custom fit. This is especially useful if you have smaller nails or want to create specific designs.
Do I need any special tools to apply nail strips?
While no special tools are required, having a nail file, scissors, and a cuticle pusher can make the application process smoother and more precise.
Can I use nail strips on toenails?
Yes, nail strips can be used on toenails as well. The application process is similar, and they can add a fun and stylish touch to your pedicure.
How do I store unused nail strips?
To keep unused nail strips fresh, store them in a cool, dry place and reseal the packaging tightly. Some people even store them in the refrigerator to extend their shelf life.
Tags: Trimming Scissors Trim


