Key Takeaways
- Versatility and Practicality: The three strand braid is a versatile hairstyle suitable for various occasions and weather conditions, making it a practical choice for everyday wear.
- Cost-Effective and Time-Saving: Mastering this braid at home can save you money on salon visits and time spent on appointments, allowing for quick and convenient styling.
- Personal Expression and Skill Development: Practicing the three strand braid enhances your hairstyling skills and allows for creative expression, enabling you to customize the braid to reflect your unique style.
The three strand braid is a timeless and versatile hairstyle that can effortlessly elevate your look for any occasion. Whether you’re heading to a formal event, a casual outing, or a business meeting, this classic braid offers a touch of elegance and sophistication. At Your Beauty Marks, we believe in empowering you to create stunning hairstyles at home, saving you both time and money. In this blog post, we’ll guide you through the benefits and steps of mastering the three strand braid, making it a go-to style in your beauty repertoire.
Why Choose a Three Strand Braid?
Versatility
The three strand braid is incredibly versatile, making it suitable for a wide range of outfits and events. Whether you’re wearing a casual sundress, a business suit, or an elegant evening gown, this braid can complement your look perfectly. Its adaptability ensures that you can easily transition from day to night without needing to restyle your hair.
Practicality
One of the most practical aspects of the three strand braid is its ability to manage your hair in various weather conditions. Whether it’s a hot summer day or a windy autumn afternoon, this braid keeps your hair neatly in place, reducing frizz and flyaways. It’s an excellent choice for those who lead active lifestyles and need a reliable hairstyle that stays put.
Personal Expression
Hairstyling is a form of personal expression, and the three strand braid offers endless opportunities for creativity. You can experiment with different braiding techniques, incorporate accessories, or even add a splash of color to make the style uniquely yours. This braid allows you to showcase your individuality while maintaining a polished appearance.
Cost-Effective DIY Hairstyling
Salon Costs vs. DIY
Visiting a salon for a professional braid can be expensive, especially if you want to maintain the style regularly. By mastering the three strand braid at home, you can save a significant amount of money. The only investment required is a few essential tools, which we’ll discuss later in this post. Over time, these savings can add up, making DIY hairstyling a cost-effective choice.
Time Savings
Another advantage of DIY hairstyling is the time you save. No more waiting for salon appointments or spending hours in a stylist’s chair. Once you get the hang of it, creating a three strand braid can be done in minutes, giving you more time to focus on other important tasks or simply enjoy your day.
Skill Development
Practicing the three strand braid not only saves you money and time but also helps you develop a valuable skill. The more you practice, the better you’ll become at creating neat, professional-looking braids. This skill can be a great addition to your beauty toolkit, allowing you to experiment with other braiding techniques and styles in the future.
Essential Materials for a Flawless Three Strand Braid
Hair Brush
Before you start braiding, it’s crucial to detangle your hair thoroughly. A high-quality hair brush helps smooth out any knots and ensures that your braid looks sleek and polished. Opt for a brush with flexible bristles to minimize breakage and keep your hair healthy.
Hair Comb
A fine-tooth comb is essential for creating even sections and clean parts. This tool helps you achieve a more precise and professional-looking braid. Use the comb to divide your hair into three equal sections before you begin braiding.
Water
Lightly misting your hair with water can help control frizz and make it easier to manage while braiding. Damp hair is more pliable and less likely to have flyaways, resulting in a smoother braid. However, avoid soaking your hair, as it can make the braid too tight and uncomfortable.
Hair Bands
Secure your braid with a reliable hair band to ensure it stays in place throughout the day. Look for hair bands that are gentle on your hair and won’t cause breakage. Brands like Invisibobble and Scünci offer excellent options that provide a secure hold without damaging your hair.
Hair Spray
Finish your braid with a light mist of hair spray to keep it looking fresh and intact. Hair spray helps maintain the style and prevents any loose strands from escaping. Choose a flexible hold spray that allows your hair to move naturally while still providing the necessary hold.
Step-by-Step Guide to Creating the Perfect Three Strand Braid
Step 1: Prep Your Hair
Start by thoroughly brushing and detangling your hair. This step is crucial for achieving a smooth and polished braid. Use a hair brush with flexible bristles to minimize breakage and ensure your hair is free of knots.
Step 2: Sectioning the Hair
Next, use a fine-tooth comb to divide your hair into three equal sections. Hold each section separately to keep them from tangling. Ensuring that the sections are even will help create a balanced and neat braid.
Step 3: Braiding Each Section
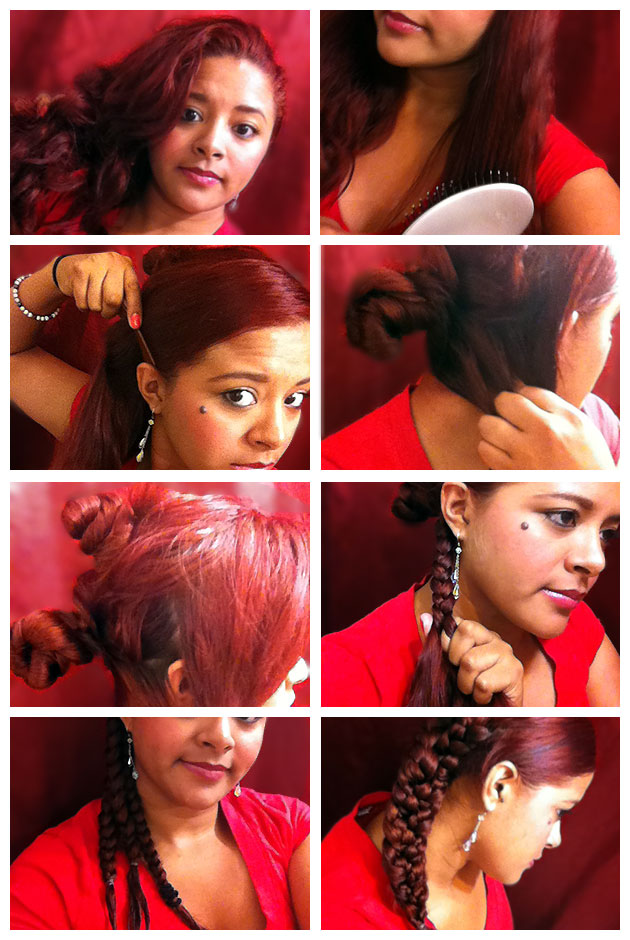
Begin the braiding process by crossing the right section over the middle section, then the left section over the new middle section. Continue this pattern, alternating sides, until you reach the end of your hair. Keep the braid tight and consistent for a clean look.
Step 4: Securing the Braid
Once you’ve braided down to the end of your hair, secure it with a hair band. Make sure the band is tight enough to hold the braid in place but not so tight that it causes discomfort. For an extra touch of elegance, you can wrap a small piece of hair around the band to conceal it.
Step 5: Finishing Touches
To complete the look, lightly mist your braid with hair spray to keep it in place. If you notice any loose strands or flyaways, use a small amount of hair gel or pomade to smooth them down. For added flair, consider incorporating accessories like hairpins, ribbons, or beads.
Tips for a Stunning Three Strand Braid
Practice Makes Perfect
Like any skill, mastering the three strand braid takes practice. Don’t be discouraged if your first few attempts aren’t perfect. Keep practicing, and you’ll notice significant improvement over time. The more you braid, the more confident and proficient you’ll become.
Styling Variations
One of the best things about the three strand braid is its versatility. You can customize it in numerous ways to suit your style and personality. Here are a few ideas:
- Accessories: Add hairpins, ribbons, or beads to your braid for a touch of glamour.
- Incorporate Color: Weave in colored hair extensions or ribbons to make your braid pop.
- Different Textures: Try braiding with wavy or curly hair for a unique look.
Maintenance Tips
To keep your braid looking fresh throughout the day, follow these maintenance tips:
- Avoid Touching: Constantly touching your braid can cause it to loosen and frizz.
- Use Hair Spray: A light mist of hair spray can help maintain the braid’s shape and hold.
- Secure Loose Strands: Carry a few bobby pins with you to fix any stray hairs that may come loose.
Conclusion
The three strand braid is a stylish, practical, and versatile hairstyle that can elevate your look for any occasion. By mastering this classic braid, you can enjoy the benefits of cost-effective DIY hairstyling, save time, and develop a valuable skill. With the right materials and a bit of practice, you’ll be able to create a flawless braid that showcases your personal style and creativity.
We encourage you to give the three strand braid a try and share your experiences with us. Whether you’re a beginner or a seasoned braider, there’s always room to experiment and have fun with your hairstyle. Don’t forget to explore more hairstyle tutorials on Your Beauty Marks for further inspiration and tips.
Frequently Asked Questions
How long does it take to master the three strand braid?
The time it takes to master the three strand braid varies from person to person. With regular practice, most people can become proficient within a few weeks. The key is to practice consistently and not get discouraged by initial challenges.
Can I braid my hair if it’s short?
Yes, you can braid short hair, although it may be a bit more challenging. For very short hair, consider using hair extensions to add length and volume, making the braiding process easier and more effective.
What should I do if my braid keeps coming loose?
If your braid keeps coming loose, ensure you’re securing it tightly with a quality hair band. Additionally, using a light mist of hair spray can help keep the braid intact. For extra security, you can also use bobby pins to hold any loose strands in place.
How can I add volume to my braid?
To add volume to your braid, gently pull on the edges of the braid after securing it. This technique, known as “pancaking,” helps create a fuller and more voluminous look. You can also use volumizing products or tease your hair slightly before braiding.
Is it better to braid hair when it’s wet or dry?
It’s generally easier to braid hair when it’s slightly damp, as it helps control frizz and makes the hair more manageable. However, avoid braiding hair when it’s soaking wet, as it can be too tight and uncomfortable. If you prefer braiding dry hair, use a bit of hair spray or water to tame any flyaways.
Tags: DIY, Hair Spray, ULTA


