Three Key Takeaways
- Preparation is Key: Gathering all necessary materials and creating a soothing atmosphere sets the stage for a successful and relaxing DIY pedicure.
- Step-by-Step Care: Following each step meticulously—from soaking and exfoliating to moisturizing and nail preparation—ensures that your feet are well-cared for and your pedicure looks professional.
- Enjoy the Process: The DIY pedicure is not just about the end result but also about taking time for yourself. Enjoy the relaxation and self-care benefits that come with pampering your feet.
Welcome to Your Beauty Marks, where we believe that beauty and self-care should be both accessible and enjoyable. Today, we’re diving into the world of DIY pedicures—a fantastic way to pamper yourself without breaking the bank. A well-done pedicure not only leaves your feet looking fabulous but also promotes relaxation and well-being. Plus, when done correctly, the results can last for weeks. Ready to treat your feet to some TLC? Let’s get started!
Step 1: Gather Your Materials
Before you begin your DIY pedicure, it’s essential to have all the necessary tools and products at hand. Here’s a list of what you’ll need:
- Epsom salt
- Pumice stone or foot file
- Foot scrub
- Moisturizer
- Cuticle cream
- Nail clippers
- Nail file
- Buffer
- Acetone or nail polish remover
- Base coat, nail polish, and top coat
When choosing your materials, opt for high-quality products to ensure the best results. For example, a good pumice stone will effectively remove dead skin without causing irritation. Additionally, prepare your workspace by laying down a towel and arranging your tools within easy reach. This will make the process smoother and more enjoyable.
Step 2: Create a Soothing Atmosphere
One of the best parts of a DIY pedicure is the opportunity to create a relaxing environment tailored to your preferences. Here are some suggestions to set the mood:
- Lighting: Dim the lights or use candles to create a calming ambiance.
- Music: Play your favorite soothing tunes or nature sounds to help you unwind.
- Aromatherapy: Use essential oils or scented candles to fill the room with a pleasant fragrance.
- Comfort: Ensure you have a comfortable chair and a footrest to make the experience more enjoyable.
Minimizing distractions is crucial for achieving relaxation. Turn off your phone or set it to silent mode, and let everyone in your household know that you’re taking some time for yourself. Creating a peaceful atmosphere will enhance the overall experience and make your DIY pedicure feel like a spa treatment.
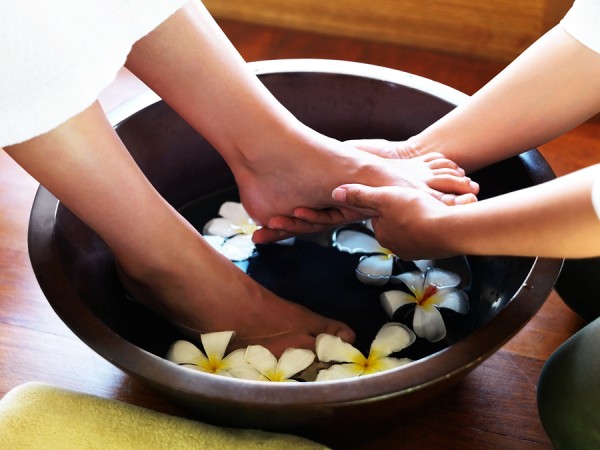
Step 3: Soak Your Feet
Now that your materials are ready and your atmosphere is set, it’s time to soak your feet. Follow these steps for a rejuvenating foot bath:
- Fill a basin: Fill a basin or foot spa with warm water. The water should be comfortably warm but not too hot.
- Add Epsom salt: Dissolve a handful of Epsom salt into the water. Epsom salt helps to soften the skin and soothe tired muscles.
- Optional add-ins: For an extra touch of luxury, consider adding a few drops of essential oil or a splash of your favorite bubble bath.
- Soak your feet: Immerse your feet in the water and relax for 10-15 minutes. This will soften your skin, making it easier to exfoliate and treat your feet.
Soaking your feet not only prepares them for the next steps but also provides a moment of tranquility and relaxation. Enjoy this time to unwind and let the stress of the day melt away.
Step 4: Exfoliate and Pamper Your Feet
After soaking, your feet will be soft and ready for exfoliation. Follow these techniques to remove dead skin and reveal smoother, healthier feet:
- Use a pumice stone or foot file: Gently rub the pumice stone or foot file over the rough areas of your feet, such as the heels and arches. Use circular motions to effectively slough off dead skin.
- Apply foot scrub: Massage a foot scrub onto your feet, focusing on the same rough areas. The scrub will help to further exfoliate and polish your skin.
- Rinse and dry: Thoroughly rinse your feet with warm water to remove any remaining scrub and dead skin. Pat your feet dry with a clean towel, making sure to dry between your toes to prevent moisture buildup.
Exfoliating your feet is a crucial step in achieving a smooth and polished look. It not only removes dead skin but also promotes better circulation and overall foot health. Take your time with this step to ensure your feet are thoroughly pampered.
Step 5: Moisturize and Care for Cuticles
With your feet now exfoliated, it’s time to hydrate and care for your skin and cuticles. Follow these steps to keep your feet soft and your nails healthy:
- Apply moisturizer: Choose a rich, hydrating foot cream or lotion and massage it into your feet. Pay special attention to the heels and any other dry areas. This will help to lock in moisture and keep your skin soft.
- Use cuticle cream: Apply a cuticle cream or oil to the base of your toenails. Gently massage it in to soften the cuticles and promote healthy nail growth.
- Push back cuticles: Using a cuticle pusher, gently push back the softened cuticles. Be careful not to cut or damage them, as this can lead to infection.
Moisturizing and caring for your cuticles is essential for maintaining the health and appearance of your feet and nails. Regularly moisturizing will prevent dryness and cracking, while proper cuticle care will keep your nails looking neat and well-groomed.
Step 6: Nail Preparation
Now that your feet are moisturized and your cuticles are cared for, it’s time to prepare your nails for polish. Follow these guidelines for trimming, shaping, and buffing your nails:
- Trim your nails: Use a pair of nail clippers to trim your toenails to your desired length. Cut straight across to prevent ingrown nails.
- Shape your nails: Use a nail file to shape the edges of your nails. Smooth out any rough edges and create a uniform shape.
- Buff the surface: Gently buff the surface of your nails with a nail buffer. This will create a smooth surface for the polish to adhere to.
- Clean with acetone: Wipe your nails with a cotton pad soaked in acetone or nail polish remover. This will remove any oils or residue, ensuring a clean surface for polish application.
Proper nail preparation is key to achieving a flawless polish application. Taking the time to trim, shape, and buff your nails will ensure that your pedicure looks professional and lasts longer.
Step 7: Polish Your Nails to Perfection
With your nails prepped and ready, it’s time to add some color and shine. Follow these step-by-step instructions for a flawless polish application:
- Apply a base coat: Start with a thin layer of base coat to protect your nails and create a smooth surface for the polish. Allow it to dry completely before moving on to the next step.
- Apply nail polish: Choose your favorite nail polish color and apply a thin, even layer. Start with a stroke down the center of the nail, followed by strokes on either side. Allow the first coat to dry before applying a second coat for full coverage.
- Apply a top coat: Once your nail polish is dry, apply a top coat to seal in the color and add a glossy finish. This will also help to extend the life of your pedicure.
- Allow drying time: Be patient and allow plenty of time for each layer to dry completely. This will prevent smudging and ensure a long-lasting finish.
For an extra touch of creativity, consider adding nail art or using a different color for an accent nail. Whether you prefer a classic look or something more adventurous, the key is to take your time and enjoy the process.
Conclusion
Congratulations! You’ve completed your DIY pedicure and your feet should now look and feel amazing. By following these seven essential steps, you’ve not only saved money but also enjoyed a relaxing and rewarding self-care experience. A well-done pedicure can boost your confidence and keep your feet healthy and beautiful for weeks.
Remember, the process is just as important as the results. Taking the time to pamper yourself and care for your feet can be a wonderful way to unwind and practice self-love. And while DIY pedicures are fantastic, don’t hesitate to treat yourself to a professional spa visit every now and then for an extra dose of luxury and relaxation.
Frequently Asked Questions
How often should I do a DIY pedicure?
It’s generally recommended to do a DIY pedicure every 2-4 weeks. This frequency helps maintain the health and appearance of your feet and nails. However, you can adjust based on your personal needs and lifestyle.
Can I use regular body lotion as a foot moisturizer?
While regular body lotion can provide some hydration, foot-specific moisturizers are formulated to address the thicker skin and unique needs of your feet. For the best results, opt for a rich, hydrating foot cream.
What should I do if I accidentally cut my cuticles?
If you accidentally cut your cuticles, clean the area with antiseptic to prevent infection. Apply a small amount of antibiotic ointment and cover with a bandage if necessary. Avoid further irritation and allow the area to heal completely before your next pedicure.
How can I make my nail polish last longer?
To extend the life of your nail polish, make sure to apply thin layers and allow each coat to dry completely. Using a high-quality base coat and top coat can also significantly improve the longevity of your polish. Additionally, avoid activities that may chip your polish, such as excessive exposure to water or harsh chemicals.
Are there any alternatives to using a pumice stone?
Yes, there are several alternatives to a pumice stone for exfoliating your feet. You can use a foot file, an electric foot callus remover, or a foot scrub with exfoliating particles. Choose the option that best suits your preference and skin sensitivity.


