Key Takeaways
- Preparation is Crucial: Having the right tools and understanding the steps involved will set you up for success. Make sure you have a spooly brush, cuticle scissors, tweezers, a brow pencil, and a stiff brow shadow brush.
- Precision and Patience: Take your time with each step, especially when trimming and tweezing. Precision and patience will help you achieve a clean, well-defined shape without over-plucking.
- Regular Maintenance: Consistent upkeep every two weeks will keep your brows looking sharp and well-defined. Regular touch-ups will make the process quicker and easier over time.
Your eyebrows frame your face, but getting them just right can be tricky. Whether you’re a beginner or simply looking for some pro tips, these 7 simple steps will help you shape and define your eyebrows for a flawless look. Well-shaped brows can enhance your overall appearance, so let’s get started!
Step 1: Gather Your Essential Eyebrow Tools
Before you start shaping your eyebrows, it’s crucial to have the right tools on hand. Here’s what you’ll need:
- Spooly Brush: For brushing your brow hairs into place.
- Cuticle Scissors: To trim any excess length.
- Angled Tweezers: For plucking stray hairs with precision.
- Pointed Tweezers: To remove stubborn or short hairs.
- Brow Pencil: For defining the shape and filling in sparse areas.
- Stiff Brow Shadow Brush: To apply brow shadow and set your shape.
Each tool plays an important role in helping you achieve precise, clean shapes. For those with sensitive skin, opt for hypoallergenic products. Having the right tools at your disposal is the first step towards perfectly shaped brows.
Step 2: Brush Up and Trim the Excess
With your tools in hand, it’s time to start shaping your brows. Follow these steps to brush and trim your brows:
- Brush Up: Use the spooly brush to brush your brow hairs upwards. This will help you see the natural shape of your brows and identify any hairs that are too long.
- Trim Excess: Carefully use the cuticle scissors to trim any hairs that extend beyond your natural brow shape. Be cautious and trim a little at a time to avoid cutting too much. For beginners, an electric brow trimmer can be a safer option to prevent over-trimming.
Brushing and trimming your brows will give them a neat and tidy appearance, setting the stage for the next steps in shaping.
Step 3: Define Your Shape with a Pencil
Defining the shape of your eyebrows is a crucial step in achieving a polished look. Here’s how to do it:
- Find the Starting Point: Hold a brow pencil vertically alongside the bridge of your nose. The point where the pencil meets your brow is where your eyebrow should start. Mark this spot lightly with the pencil.
- Locate the Arch: Angle the pencil from the outer edge of your nose, crossing the center of your iris (the colored part of your eye). The point where the pencil intersects your brow is where your arch should be. Mark this spot as well.
- Determine the End: Finally, angle the pencil from the outer edge of your nose to the outer corner of your eye. The point where the pencil meets your brow is where your eyebrow should end. Mark this spot lightly.
Adjust this method according to your face shape for the most flattering results:
- Round Face: Aim for a higher arch to add length to your face.
- Oval Face: Opt for a soft curve to maintain balance.
- Square Face: Choose an angled brow to soften strong jawlines.
By defining your shape with a pencil, you’ll have a clear guide for the next steps, ensuring your brows are symmetrical and well-proportioned.
Step 4: Tweeze With Precision
Now that you’ve defined your brow shape, it’s time to remove any stray hairs. Follow these steps for precise tweezing:
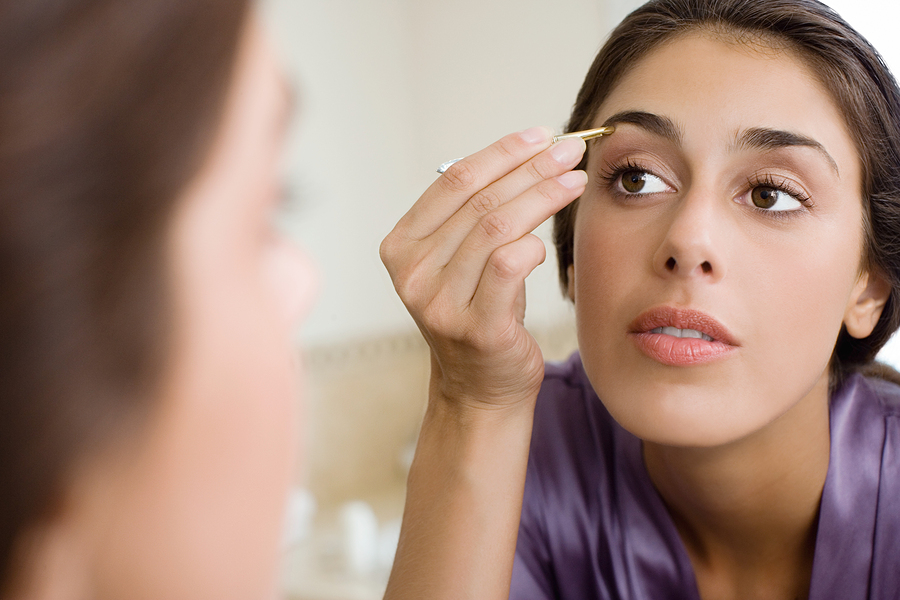
- Use Angled Tweezers: Start by using angled tweezers to pluck stray hairs from above and below your brow line. This will help you achieve a cleaner shape.
- Follow Up with Pointed Tweezers: For stubborn or short hairs that are difficult to grasp, use pointed tweezers. These are perfect for getting those tiny, hard-to-reach hairs.
- Avoid Over-Plucking: Be cautious not to over-pluck. It’s better to remove a few hairs at a time and step back to assess your progress. If you accidentally over-pluck, you can always use a brow pencil or powder to fill in sparse areas while waiting for regrowth.
Precision tweezing ensures that your brows are well-defined and free of stray hairs, giving you a polished and clean look.
Step 5: Fill In Your Brows with Feathered Strokes
Filling in your brows is essential for achieving a fuller, more defined look. Here’s how to do it effectively:
- Choose the Right Brow Pencil: Select a brow pencil that matches your natural brow color. This will help create a seamless and natural look.
- Use Feathered Strokes: Lightly fill in your brows using short, feathered strokes to mimic the appearance of natural hair. Start at the inner corner of your brow and work your way towards the tail.
- Focus on Sparse Areas: Pay extra attention to areas that are sparse or need more definition, such as the arch and outer edge. Avoid using too much product to prevent an overdone look.
Feathered strokes create a more natural appearance compared to solid lines, making your brows look fuller and well-defined without appearing artificial.
Step 6: Set It with Brow Shadow and a Stiff Brush
Setting your brows ensures they stay in place all day. Follow these steps to lock in your look:
- Apply Brow Shadow: Using a stiff brow shadow brush, apply a brow shadow that matches your brow color. This will help set the pencil and add depth to your brows.
- Blend for a Natural Look: Start at the inner part of your brows and blend outward. Make sure to blend well to avoid harsh lines and achieve a natural finish.
- Optional Brow Gel: For extra hold, you can use a clear or tinted brow gel. Apply it in upward strokes to keep your brow hairs in place and add a polished touch.
Setting your brows with shadow and gel ensures they maintain their shape and definition throughout the day, giving you a polished and long-lasting look.
Step 7: Maintain Every Two Weeks
Regular maintenance is key to keeping your brows looking sharp and well-defined. Here’s how to keep them in top shape:
- Schedule Regular Touch-Ups: Aim to shape your eyebrows every two weeks. This will help you stay on top of any new growth and maintain a clean look.
- Focus on Trimming and Tweezing: During your maintenance sessions, focus on trimming any excess length and tweezing stray hairs. This will keep your brows neat without needing a full reshaping.
- Quick Fill-Ins: If you’re in a rush, a quick fill-in with a brow pencil or powder can make a big difference. This will help you maintain a polished look even between full grooming sessions.
By maintaining your brows every two weeks, you’ll ensure they stay tidy and well-defined, making it easier to achieve a flawless look every day.
Bonus Tips: What to Do if You Over-Pluck
Over-plucking can happen to the best of us. If you find yourself with sparse or uneven brows, don’t worry! Here are some tips to fix over-plucked eyebrows:
- Use Brow Pencils and Powders: While waiting for your brows to grow back, use brow pencils or powders to fill in the gaps. Opt for a shade that matches your natural brow color for the most natural look.
- Try Brow Growth Serums: Consider using brow growth serums to speed up the regrowth process. These serums are designed to nourish and stimulate hair growth, helping you regain fuller brows faster.
- Practice Soft Filling Techniques: When filling in over-plucked areas, use soft, feathered strokes to avoid a heavy or artificial appearance. This will help create a more natural look while your brows grow back.
Remember, patience is key. Over time, your brows will grow back, and with these tips, you can maintain a polished look in the meantime.
Conclusion: Flaunt Your Perfectly Shaped Brows
Shaping your eyebrows may take a bit of practice, but with these easy steps, you’ll master it in no time. Remember to:
- Gather the essential tools.
- Brush and trim your brows.
- Define your shape with a pencil.
- Tweeze with precision.
- Fill in with feathered strokes.
- Set with brow shadow and a stiff brush.
- Maintain every two weeks.
And don’t forget the bonus tips for fixing over-plucked brows. Take it slow, and you’ll soon be flaunting perfectly shaped brows that enhance your overall appearance. Share your results and show off your freshly shaped brows!
Frequently Asked Questions
How often should I shape my eyebrows?
It’s recommended to shape your eyebrows every two weeks. Regular maintenance helps keep your brows tidy and well-defined, making it easier to manage new growth and maintain a polished look.
What should I do if I accidentally over-pluck my eyebrows?
If you over-pluck your eyebrows, don’t panic! Use a brow pencil or powder to fill in the gaps while waiting for your brows to grow back. Consider using a brow growth serum to speed up the regrowth process. Practice soft filling techniques to avoid a heavy or artificial appearance.
How do I choose the right brow pencil color?
Select a brow pencil that matches your natural brow color. If you’re unsure, opt for a shade slightly lighter than your natural color for a more natural look. This helps create a seamless and natural appearance when filling in your brows.
Can I use brow gel instead of brow shadow?
Yes, you can use brow gel instead of brow shadow to set your brows. Brow gel provides a stronger hold and can help keep your brow hairs in place throughout the day. Choose between clear or tinted brow gel based on your preference.
What face shapes benefit from different brow shapes?
- Round Face: Aim for a higher arch to add length to your face.
- Oval Face: Opt for a soft curve to maintain balance.
- Square Face: Choose an angled brow to soften strong jawlines.
Are there any tools that are beginner-friendly?
For beginners, an electric brow trimmer can be a safer option for trimming excess length without cutting too much. Additionally, using angled tweezers for general shaping and pointed tweezers for stubborn hairs can make the tweezing process easier and more precise.


