Key Takeaways
- Preparation is Crucial: Starting with clean, well-prepared nails sets the foundation for successful nail art. Don’t skip essential steps like removing old polish, caring for cuticles, and washing hands.
- Creativity Knows No Bounds: Embrace your artistic side by experimenting with different colors, patterns, and tools. Whether you prefer bold contrasts or subtle hues, let your imagination guide your designs.
- Practice Makes Perfect: Nail art is a skill that improves over time. Be patient with yourself and enjoy the learning process. With each attempt, you’ll gain confidence and refine your technique.
Nail art has become a vibrant form of self-expression, allowing individuals to showcase their unique style and creativity. Whether you’re a fan of bold designs or subtle accents, nail art offers endless possibilities to elevate your look. At Your Beauty Marks, we believe in the power of DIY nail art to not only enhance your appearance but also to promote sustainability and affordability in beauty routines.
In this blog post, we’ll explore the benefits of creating your own nail art at home, focusing on the playful and timeless design of polka dots. From preparation to execution, we’ll guide you through the process, ensuring you achieve stunning results without breaking the bank. Let’s dive into the world of DIY nail art and discover how you can express yourself with style and flair!
Nail Preparation Essentials
Removing Old Polish
Before you begin your polka dot masterpiece, it’s crucial to start with a clean slate. Removing old polish ensures that your new design adheres properly and lasts longer. We recommend using gentle, acetone-free polish removers to protect your nails from damage. Some popular choices include:
- Non-acetone nail polish remover pads
- Natural soy-based polish removers
- Hydrating polish removers with added vitamins
Cuticle Care
Next, focus on your cuticles. Pushing back your cuticles with an orange stick helps create a neat and tidy canvas for your nail art. Additionally, applying cuticle oil can keep your nails healthy and hydrated, preventing breakage and promoting growth. Consider these benefits:
- Improved nail appearance and health
- Enhanced polish adhesion
- Reduced risk of hangnails
Washing Hands
Finally, cleanliness is key to achieving a flawless finish. Washing your hands thoroughly removes any oils or residues that could interfere with polish adhesion. Use warm water and a gentle soap, and don’t forget to dry your hands completely before moving on to the next step. This simple yet essential step ensures your nail art stays intact and vibrant.
Materials You’ll Need
Essential Items
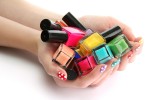
To create stunning polka dot nail art, you’ll need a few basic materials. Gather these items to ensure a smooth and enjoyable DIY experience:
- Nail Polishes: Choose at least two colors—one for the base and one for the dots. Consider using contrasting colors for a striking effect.
- Base Coat: A good base coat protects your nails and enhances polish longevity.
- Top Coat: A clear top coat adds shine and durability to your design.
- Dotting Tools: These can be purchased or improvised using items like bobby pins, toothpicks, or the end of a paintbrush.
- Nail Tape: Useful for creating clean lines and sections on your nails.
- Orange Stick: For cuticle care and precision work.
Optional Materials for Advanced Techniques
If you’re feeling adventurous and want to explore more complex designs, consider adding these optional materials to your toolkit:
- Nail Art Brushes: Perfect for intricate designs and detailing.
- Glitter or Rhinestones: Add some sparkle and dimension to your polka dots.
- Matte Top Coat: For a unique, non-glossy finish.
- Nail Art Stickers: Easy-to-use embellishments for added flair.
With these materials at your disposal, you’re ready to embark on your polka dot nail art journey. Let’s move on to the step-by-step guide and bring your creative vision to life!
Step-by-Step Guide to Creating Polka Dot Nail Art
1. Base Coat Application
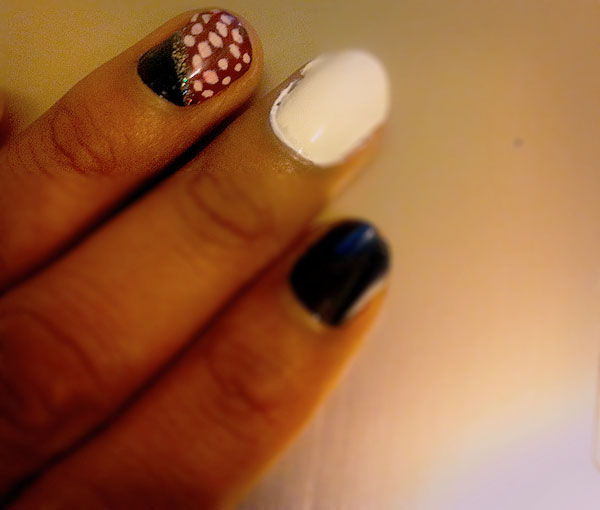
Begin by applying a base coat to protect your nails and provide a smooth surface for your polish. Choose a base color that complements your polka dots. Popular choices include classic white, pastel shades, or even a bold black for contrast. Here are some tips for an even application:
- Apply a thin layer and allow it to dry completely before proceeding.
- Use long, even strokes from the base to the tip of your nail.
- Ensure full coverage, especially around the edges.
2. Using Tape for Design
For those who love precision, nail tape is your best friend. It helps create clean lines and sections on your nails, setting the stage for your polka dots. Here’s how to effectively use tape in your design:
- Cut small strips of tape and place them on your nails in the desired pattern.
- Ensure the tape is firmly pressed down to prevent polish from seeping underneath.
- Consider creating geometric shapes or stripes as a base for your dots.
Alternatively, if you prefer a more freehand approach, you can skip the tape and use a steady hand to paint your base design. Either way, let your creativity guide you!
3. Adding Polka Dots
Now comes the fun part—adding the polka dots! This step allows you to unleash your creativity with different tools and color combinations. Follow these techniques for perfect dots:
- Using Dotting Tools: Dip the tool into your chosen polish color and gently press it onto your nail. Vary the pressure to create different dot sizes.
- Improvised Tools: If you don’t have a dotting tool, use the rounded end of a bobby pin, a toothpick, or even a ballpoint pen.
- Color Combinations: Experiment with contrasting colors for a bold look or stick to monochrome for a chic style. Try alternating colors for each nail or create a gradient effect.
Remember, there’s no right or wrong way to create your polka dots. Feel free to mix and match patterns to suit your personal style!
4. Finishing Touches
With your polka dots in place, it’s time to add the finishing touches that will elevate your nail art to the next level. Follow these steps for a polished and professional look:
- Joining Sides: If your design includes sections or lines, consider adding a thin line of polish along the edges to unify the look. This can be done with a fine brush or a striping tool.
- Applying a Clear Top Coat: Seal your design with a clear top coat to add shine and protect your artwork. This step also enhances durability, ensuring your polka dots last longer without chipping.
- Final Touches: Clean up any stray polish around your nails with a small brush dipped in polish remover for a neat finish.
Allow your nails to dry completely, and voilà! You’ve created a stunning polka dot nail art design right at home. With practice, you’ll refine your technique and explore even more creative possibilities.
Tips for Success
A. Common Mistakes to Avoid
Even the most experienced nail artists encounter challenges. Here are some common mistakes to watch out for and how to avoid them:
- Rushing Drying Time: Patience is key. Allow each layer of polish to dry thoroughly before moving on to the next step to prevent smudging.
- Overloading the Brush: Use a minimal amount of polish on your dotting tool to achieve clean, precise dots.
- Skipping the Base or Top Coat: These coats are essential for protecting your nails and extending the life of your design.
B. Encouraging Creativity with Color Rotation
Don’t be afraid to experiment with different color combinations. Rotating colors between nails or even within a single nail can create a dynamic and eye-catching effect. Consider seasonal themes or your favorite color palettes to inspire your designs.
C. Emphasizing Patience and Practice
Like any art form, nail art improves with practice. Be patient with yourself as you learn new techniques and refine your skills. Over time, you’ll develop a steady hand and a keen eye for detail, allowing you to create intricate and beautiful designs with ease.
Conclusion
Creating polka dot nail art at home is not only a fun and creative endeavor but also a rewarding way to express your personal style. With the right preparation, materials, and techniques, you can achieve salon-quality results without leaving the comfort of your home. Remember, the key to stunning nail art lies in patience, practice, and a willingness to experiment with colors and patterns.
At Your Beauty Marks, we are committed to helping you explore the world of DIY beauty with tips and tricks that emphasize sustainability and affordability. We hope this guide inspires you to embrace your creativity and enjoy the process of crafting your own unique nail art designs.
Ready to take your nail art skills to the next level? Check out our other blog posts for more inspiration and tutorials. Happy painting!
Frequently Asked Questions
1. What tools can I use to create polka dots if I don’t have a dotting tool?
If you don’t have a dotting tool, you can use everyday items like the rounded end of a bobby pin, a toothpick, or even the tip of a ballpoint pen. These improvised tools can help you achieve similar results with varying dot sizes.
2. How can I make my nail art last longer?
To extend the life of your nail art, ensure you apply a base coat before your polish and a top coat after your design is complete. Additionally, avoid activities that may chip your nails, and consider wearing gloves when doing chores.
3. How do I fix mistakes in my nail art?
If you make a mistake, don’t worry! Use a small brush dipped in nail polish remover to carefully clean up any stray polish. For larger errors, you may need to remove the polish from that nail and start over. Practice makes perfect!
4. Can I use gel polish for polka dot nail art?
Yes, you can use gel polish for polka dot nail art. Just make sure to cure each layer under a UV or LED lamp as per the gel polish instructions. This will ensure your design is set and long-lasting.
5. How do I choose the right color combinations for my polka dots?
Choosing the right color combinations depends on your personal style and the look you want to achieve. For a bold statement, use contrasting colors. For a more subtle look, opt for shades within the same color family. Seasonal themes or trending colors can also provide inspiration.
Tags: Water Prep


