Key Takeaways
- Preparation is Key: Gathering the right tools and setting up a clean, organized workspace are essential steps for a successful at-home manicure. Proper preparation ensures a smoother and more enjoyable experience.
- Follow Each Step Carefully: From removing old polish to applying the top coat, each step in the manicure process is important. Taking your time and following the steps carefully will result in a professional-looking finish.
- Experiment and Enjoy: DIY manicures offer a great opportunity to experiment with different colors and styles. Have fun with the process and use it as a chance to express your creativity and personal style.
Welcome to Your Beauty Marks! In today’s fast-paced world, taking time for self-care is more important than ever. One of the most rewarding and cost-effective ways to pamper yourself is by mastering the art of the DIY manicure. Not only does it save you money, but it also offers a relaxing and therapeutic experience right in the comfort of your home.
With the rising trend of home grooming, more and more people are discovering the joys of creating salon-quality manicures without stepping out of their front door. In this guide, we’ll walk you through ten simple steps to achieve a flawless manicure at home. Let’s get started!
1. Gather Your Essential Tools
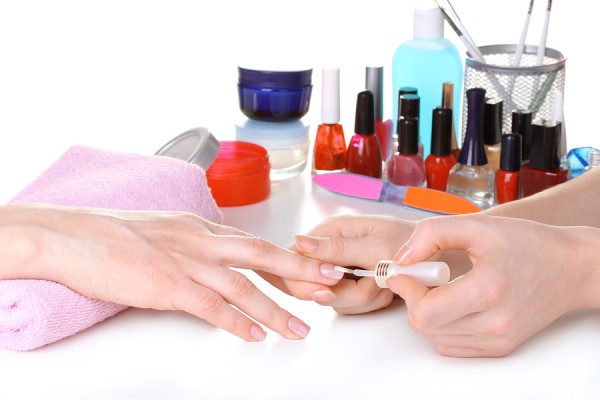
Before you begin, it’s crucial to have all the necessary tools and materials at hand. Here’s a list of what you’ll need:
- Nail polish remover
- Cotton balls and Q-tips
- Nail clippers and file
- Cuticle remover and pusher
- Base coat, polish, and top coat
You can find these items at your local drugstore or even in your home supplies. Investing in quality tools will make a significant difference in the outcome of your manicure.
2. Prepare Your Workspace
Creating a clean and organized workspace is essential for an enjoyable manicure experience. Here are some tips to set up your space:
- Cleanliness: Ensure your workspace is free from dust and clutter. A clean environment helps prevent any debris from getting onto your nails.
- Lighting: Good lighting is crucial for precision. Natural light is ideal, but a bright desk lamp can also work wonders.
- Comfort: Choose a comfortable chair and a stable surface to work on. This will help you stay relaxed and focused throughout the process.
By preparing your workspace, you’ll set the stage for a smooth and enjoyable manicure session.
3. Remove Old Nail Polish
Before you can start fresh, it’s important to remove any old nail polish. Follow these steps for effective removal:
- Soak a cotton ball: Douse a cotton ball with nail polish remover.
- Press and hold: Press the soaked cotton ball onto your nail and hold it for a few seconds to allow the remover to break down the polish.
- Wipe away: Gently wipe the cotton ball off your nail, taking the old polish with it. Repeat if necessary.
- Clean edges: Use a Q-tip dipped in nail polish remover to clean around the edges and cuticles.
Ensuring all old polish is thoroughly removed will provide a clean canvas for your new manicure.
4. Clip and File Your Nails
Once your nails are free of old polish, it’s time to shape them. Follow these tips for the best results:
- Choose your shape: Decide on a nail shape that suits your style and hand shape. Popular options include square, round, and almond.
- Clip carefully: Use nail clippers to trim your nails to the desired length. Clip straight across to avoid weakening the nail.
- File gently: Use a nail file to smooth and shape the edges. File in one direction to prevent splitting and damage. Avoid sawing back and forth.
Taking the time to properly clip and file your nails will set a strong foundation for the rest of your manicure.
5. Soak Your Nails
Soaking your nails is a crucial step that offers multiple benefits, including hydration and softness. Here’s how to do it:
- Prepare a soak solution: Fill a bowl with warm water and add a few drops of jojoba or almond oil. These oils are excellent for moisturizing and nourishing your nails and cuticles.
- Soak your nails: Submerge your fingertips in the solution for about 5-10 minutes. This will soften your cuticles and make them easier to manage.
- Pat dry: Gently pat your hands dry with a clean towel, making sure not to rub too harshly.
This step not only prepares your nails for the next stages but also offers a moment of relaxation and self-care.
6. Care for Your Cuticles
Healthy cuticles are essential for a polished manicure. Follow these steps to care for them properly:
- Apply cuticle remover: Use a cuticle remover to soften the cuticles. Apply it around the base of each nail and let it sit for a few minutes, as per the product instructions.
- Gently push back cuticles: Using a cuticle pusher, gently push back the softened cuticles. Be careful not to push too hard, as this can damage the nail bed.
- Remove excess: If necessary, use a cuticle trimmer to remove any excess cuticle skin. Be cautious and trim only the dead skin to avoid injury.
Proper cuticle care not only enhances the appearance of your nails but also promotes healthier nail growth.
7. Cleanse Your Nails Again
Before applying any polish, it’s important to ensure your nails are completely clean and free of any residue. Here’s how:
- Use a nail cleanser: Apply a nail cleanser or a bit of nail polish remover to a cotton ball and wipe each nail thoroughly. This will remove any oils or leftover cuticle remover.
- Focus on the nail surface: Make sure to clean the entire nail surface, including the edges and tips. This step ensures that the polish adheres better and lasts longer.
By cleansing your nails again, you’ll create a perfect base for your nail polish, ensuring a smooth and long-lasting finish.
8. Apply Base Coat
A base coat is essential for protecting your nails and ensuring the longevity of your manicure. Follow these steps for an even application:
- Choose a quality base coat: Select a base coat that suits your nail type, whether it’s for strengthening, smoothing, or preventing staining.
- Apply a thin layer: Brush a thin, even layer of base coat onto each nail. Start from the base and move towards the tip, covering the entire nail surface.
- Allow to dry: Let the base coat dry completely before moving on to the next step. This usually takes a few minutes.
Using a base coat not only protects your natural nails but also provides a smooth surface for your nail polish, enhancing its color and durability.
9. Polish Your Nails
Now comes the fun part—applying your chosen nail polish color. Follow these techniques for a flawless finish:
- Choose your polish: Select a high-quality nail polish in your desired color. Shake the bottle gently to mix the polish.
- Three-stroke method: Start by placing a small amount of polish on the brush. Begin at the center of the nail near the cuticle, then stroke down the middle towards the tip. Next, apply strokes on either side to cover the entire nail.
- Thin layers: Apply thin layers of polish to avoid bubbles and streaks. It’s better to apply two thin coats rather than one thick coat.
- Allow drying time: Let each coat dry completely before applying the next one. This usually takes about 2-3 minutes per coat.
By using these techniques, you’ll achieve a smooth, even finish that looks professionally done.
10. Finish with Top Coat and Drying Tips
The final step is to seal your manicure with a top coat, which adds shine and protection. Here’s how to do it:
- Apply a top coat: Brush a thin layer of top coat over each nail, covering the entire surface and extending slightly over the tips to seal the edges.
- Allow to dry: Let the top coat dry completely. This usually takes about 5-10 minutes, but it’s worth the wait to prevent smudging.
- Drying tips: To speed up drying time, you can use a quick-dry spray or drops. Alternatively, place your nails in a bowl of cold water for a few minutes to help set the polish.
Applying a top coat not only enhances the shine of your manicure but also protects it from chipping and wear, ensuring your nails look fabulous for longer.
Conclusion
Congratulations! You’ve now mastered the art of achieving a quality manicure at home. By following these ten simple steps, you can enjoy the benefits of a salon-quality manicure without the expense or hassle of leaving your house. DIY manicures are not only cost-effective but also a wonderful way to relax and indulge in some much-needed self-care.
Don’t be afraid to experiment with different colors and styles to express your unique personality. Whether you prefer classic neutrals or bold, vibrant hues, the possibilities are endless. So go ahead, gather your tools, set up your workspace, and treat yourself to a beautiful at-home manicure.
For more beauty tips and product recommendations, be sure to explore other posts on Your Beauty Marks. Happy pampering!
Frequently Asked Questions
How often should I do a manicure at home?
It’s generally recommended to do a manicure every 1-2 weeks. This frequency helps maintain nail health and keeps your hands looking polished and well-groomed.
Can I use regular household items for my manicure?
Yes, many household items can be used for a DIY manicure. For example, you can use olive oil as a cuticle softener and a bowl of warm water for soaking your nails. However, investing in some specialized tools like a good nail file and quality nail polish can make a significant difference in the results.
What should I do if my nail polish chips quickly?
If your nail polish chips quickly, make sure you are applying thin layers and allowing each layer to dry completely before adding the next. Using a high-quality base and top coat can also help extend the life of your manicure. Additionally, avoid using your nails as tools to open things or scrape surfaces, as this can cause chipping.
How can I avoid bubbles in my nail polish?
Bubbles in nail polish often occur when the polish is applied too thickly or if the bottle has been shaken vigorously. To avoid bubbles, apply thin layers of polish and roll the bottle between your hands instead of shaking it. Also, ensure your nails are clean and free of oils before applying polish.
Is it necessary to use a base coat and top coat?
Using both a base coat and a top coat is highly recommended. A base coat protects your natural nails and provides a smooth surface for the polish, while a top coat adds shine and helps prevent chipping, ensuring your manicure lasts longer.
What can I do to strengthen weak or brittle nails?
To strengthen weak or brittle nails, consider using a nail strengthener or hardener as part of your manicure routine. Additionally, keep your nails hydrated by applying cuticle oil regularly and avoid exposing them to harsh chemicals or excessive water.


